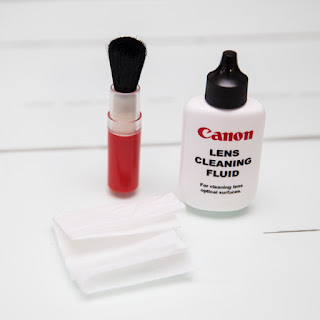
If you are like me and your favorite place to take your camera is outside into nature, you will soon find that your camera has collected some of nature’s dirt and dust on the outside — and inside. Every once in a while, it’s helpful to give it a good cleaning to make sure that everything operates properly and that your images are free from dirt spots.
A simple camera cleaning might feel like a chore, but it’s a quick process that can extend the life of your camera and keep your pictures looking sharp.
Check for particles
If it’s been a while since I last cleaned my camera and I’m about to go out on a project, I check for any problem areas. The easiest way is to photograph a clean white wall or a clean white piece of paper. Use the automatic mode so the camera exposes evenly and your photo looks kind of gray. Import the file to your computer and view it at full size. Look for dots, smudges and stringy-looking marks. Some of these may be on the lens, but some may be on the sensor. If you see anything mucking up your image, it’s time for a cleaning.
Lens
We’ll start by cleaning the camera lens — it’s the easiest part. Take off both the front and end caps. Use a soft lens cleaning brush to lightly remove any big particles or sand. You want these gone to avoid scratching the lens on the next step.
Then, use lens cleaning solution and lens tissue to wipe the glass clean. Lens tissue is non-abrasive and will keep from scratching the glass. Another option? I have found that it’s quicker to use Zeiss lens cleaning wipes and then immediately wipe the lens with a dry lens tissue to remove any residue or smudging.
Sensor
Depending on where and how often you change lenses, you may also need to clean the sensor. This part is more sensitive, so if you are not confident in your hands, you may want to send this off to a professional.
To do it yourself, all you need is a one-use sensor swab and sensor cleaning solution. Make sure the swab is the right size for your sensor. I like to put two drops of solution on either side of the swab, right in the middle so it soaks down to the tip without pooling up or dripping on the sensor.
If your swab is exactly the size of your sensor (which is ideal), in one fluid motion, wipe the sensor from one side to the other. This should be enough to clean any junk off, but if not, check for particles again and re-swab.
Body
It’s nice to clean off the body every once in a while, too, if only to keep dust from creeping onto the lens or sensor. For this, you can use cotton swabs and a cloth slightly dampened with water or rubbing alcohol. The cloth allows you to clean the flat parts of the camera and the grip. The cotton swabs let you access hard-to-reach spaces like the diopter and some of the knobs and switches.
Air cleaning
There are some cleaning systems that use air to get dust and dirt off the camera. I would recommend those small, rubber blower pumps to remove particles that could potentially scratch something. I would not recommend using pressurized air canisters. These sometimes have additional chemicals that could potentially damage your equipment.
25 Nikon DSLR Tips to Get the Most Out of Your Camera Click here
Time to Upgrade Your Smartphone Camera Click here


